First let's see the requirements:


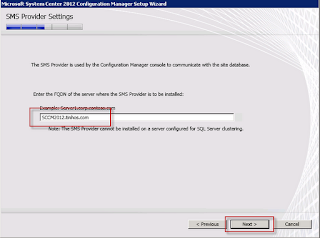
Enter the FQDN of the server where the SMS Provider will be installed. Click on Next.


- Server must be part of a Domain
- AD Schema must be extended. If you are migrating from SCCM 2007 and you have extended it before you jsut need to delegate permissions to the new SCCM 2012 server object.
- .NET Framework 3.5 and 4 (with WCF Activation)
- IIS (Webdav is no longer required)
- Remote Differential Compression
- BITS
- SQL Server 2008 SP2 CU 9 or SP3 CU4 or SQL Server 2008 R2 SP1 CU4
- SQL Server 2008 R2 SP1 CU4 is only supported for secondary sites
Run the Splash. Click on Install.

Click on Next in the first screen.
Select Install a Configuration Manager primary site. Click on Next.
Select Install a Configuration Manager primary site. Click on Next.

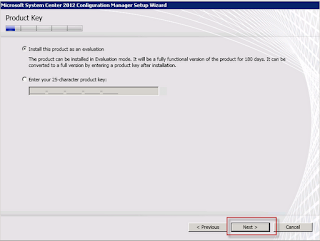
Enter your product key or select to Install this product as an evaluation. Click on Next.

Accept the license. Click on Next.
Accept the licenses. Click on Next.
Choose a folder to download prerequisite files. Click on Next.
Accept the licenses. Click on Next.
Choose a folder to download prerequisite files. Click on Next.

Select server the language and click on Next.
Select the client language and click on Next.
Select the client language and click on Next.

Now select a Site code. If you are migrating from SCCM 2007 then you will have to select a new Site code. Select a Site name and click on Next.

In this case I dont have a Central Site so I will install it as a stand-alone site. You will have to decide what type of hierarchy best suite your needs. Click on Next.

Click on Yes.

Choose the Server Name, Database name and click on Next.

Enter the FQDN of the server where the SMS Provider will be installed. Click on Next.

Select which type of communication will be allowed. If you don't have PKI select the second option. Click on Next.

Select whether you want to install the management point and distribution point and to which servers they should be installed on. Click on Next.

Select if you want to join the CEIP and click on Next.
Now revise the summary and click on Next again.
Now setup will check for any problems.
Now revise the summary and click on Next again.
Now setup will check for any problems.
If you get any warnings related to memory you can resolve them in the SQL Server Management Studio.
Right click in the database and select Properties.
Right click in the database and select Properties.

Now change the minimum and maximum server memory and click on OK.

If you Run Check again the warnings will disappear.
If you get an error around the server collation, you will have to replace the current collation.
Note: Don't do this is if you don't know what you are doing.
You can change the collation as below, just make sure to change the INSTANCENAME and the user for sqlsysadminaccounts.
You can change the collation as below, just make sure to change the INSTANCENAME and the user for sqlsysadminaccounts.

If you get the warning about WSUS just install the full WSUS 3.0 SP2 or just the console.
After you fix all errors and warnings click on Begin Install. Warnings are not required to be fixed but are recommended.
After you fix all errors and warnings click on Begin Install. Warnings are not required to be fixed but are recommended.

If everything goes well you should get the screen below.